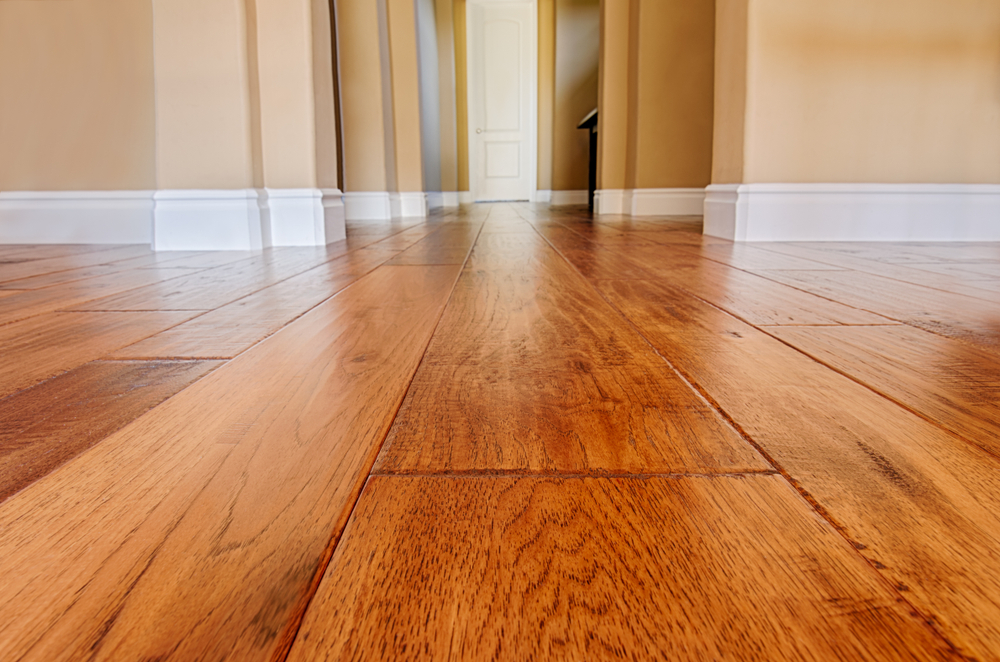
Hardwood floors are one of the most timeless and durable features a home can have. For homeowners in Vancouver, WA, these floors often represent decades of history, character, and craftsmanship tucked beneath layers of daily wear. Whether your floors are showing scratches from years of foot traffic, fading from sunlight exposure, or simply looking dull and lifeless, professional hardwood floor refinishing in Vancouver, WA is one of the smartest investments you can make. Not only does it restore the original beauty of your floors, but it also adds measurable value to your home and saves you thousands compared to full replacement.
If you have been on the fence about whether to refinish or replace, this guide will walk you through exactly why refinishing wins every time.
1. Refinishing Restores Beauty Without the Cost of Replacement
One of the biggest misconceptions homeowners in Vancouver, WA have is that heavily worn floors need to be replaced entirely. In most cases, that simply is not true. Professional hardwood floor restoration in Vancouver, WA can bring floors back to life that look completely beyond saving. Deep scratches, water stains, discoloration, and surface damage can all be addressed through a thorough refinishing process.
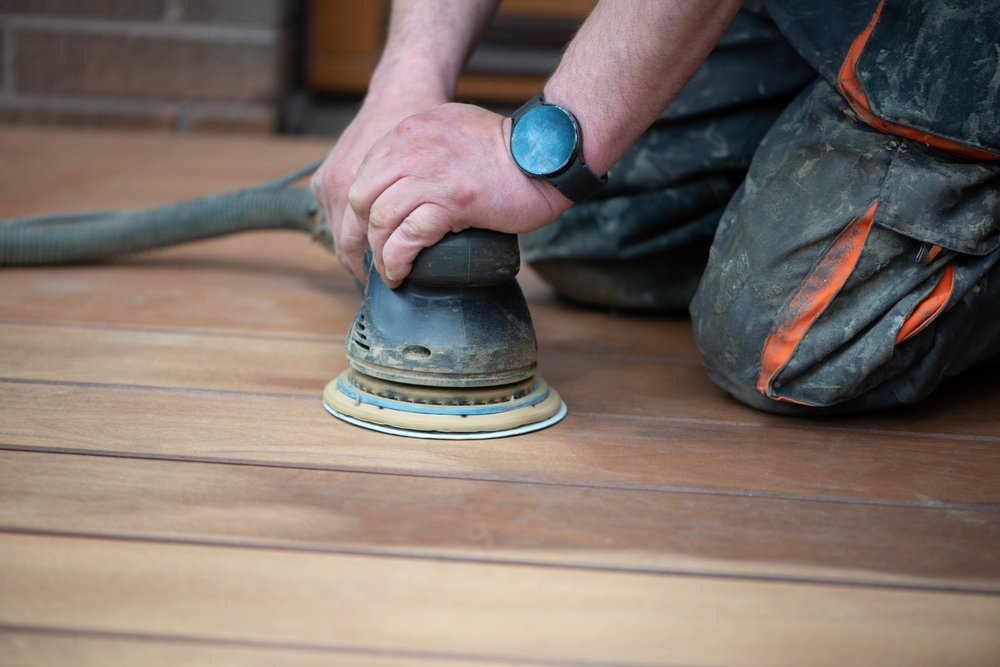
The process typically begins with hardwood floor sanding in Vancouver, WA, where a fine layer of the wood surface is removed to expose fresh, undamaged wood beneath. Once the old finish, stains, and imperfections are sanded away, the floor is stained to your preferred color and coated with a protective finish that seals and shields the wood for years to come.
Compared to the cost of tearing out existing floors and installing new hardwood, refinishing can save homeowners anywhere from 50 to 75 percent of the total project cost. For a mid-sized home in Vancouver, WA, that difference can easily amount to several thousand dollars staying in your pocket instead of going toward unnecessary replacement.
2. It Significantly Increases Your Home’s Market Value
The Pacific Northwest real estate market is competitive, and Vancouver, WA is no exception. Buyers in this region consistently place high value on hardwood flooring, and the condition of those floors plays a major role in how a home is perceived during showings and inspections. Fresh, gleaming hardwood floors signal to buyers that a home has been well maintained and cared for.
According to real estate professionals, refinished hardwood floors can increase a home’s resale value by a meaningful margin, often returning more than the cost of the refinishing project itself. When buyers walk into a home and see smooth, polished hardwood floors rather than scuffed and dull ones, their perception of the entire property shifts upward. That impression directly impacts offers.
If you are preparing to list your home in Vancouver, WA or simply want to protect your long-term investment, scheduling a professional hardwood floor refinishing service before going to market is one of the highest-return improvements you can make. It is a visible, tangible upgrade that costs far less than a kitchen remodel or bathroom renovation but delivers comparable impact on buyer appeal.
3. Professional Sanding and Repair Addresses Damage You Cannot See
Surface scratches and dullness are obvious, but hardwood floors can also suffer from problems that are not immediately visible to the untrained eye. Boards can develop soft spots, gaps between planks can widen over time due to seasonal moisture changes, and subfloor issues can cause boards to squeak, bounce, or shift. These problems, if left unaddressed, can worsen over time and lead to much more expensive repairs down the road.
Professional hardwood floor repair in Vancouver, WA goes beyond cosmetic fixes. Experienced floor technicians assess the structural integrity of each board, identify areas that need spot repairs or replacement, and address any underlying issues before the refinishing process begins. This comprehensive approach ensures that your newly refinished floors are not just beautiful on the surface but sound and stable underneath.
Hardwood floor sanding in Vancouver, WA performed by a professional also ensures a consistent, even result across the entire floor. Rental sanding machines available to DIY homeowners are powerful but notoriously difficult to control. Uneven sanding can leave swirl marks, gouges, or high spots that show clearly once a finish is applied. A professional crew uses commercial-grade equipment and years of hands-on experience to deliver a result that is smooth, level, and ready for finishing.
4. The Right Finish Protects Your Floors for Years to Come
Not all finishes are created equal, and choosing the right one for your lifestyle, foot traffic, and aesthetic preferences is a crucial part of the refinishing process. Professional hardwood floor refinishing in Vancouver, WA gives homeowners access to a range of high-quality finish options that are not readily available to the general public, along with the expertise to apply them correctly.
Oil-based polyurethane finishes offer a rich, warm tone and excellent durability, making them a popular choice for high-traffic areas. Water-based polyurethane finishes dry faster, emit fewer fumes during application, and provide a cleaner, more neutral look that suits modern aesthetics. Hardwax oil finishes are another option that penetrates the wood rather than sitting on top, offering a more natural feel underfoot while still providing solid protection.
Beyond the type of finish, the number of coats applied and the sanding between coats also affects the final result. A professional refinishing team in Vancouver, WA knows how to build up finish layers properly to achieve maximum durability and a smooth, flawless appearance. This level of detail simply cannot be replicated with a weekend DIY project and a few cans of polyurethane from the hardware store.
5. Refinishing Is a Sustainable and Environmentally Responsible Choice
Vancouver, WA is part of a broader Pacific Northwest culture that values environmental stewardship and sustainability. Refinishing your existing hardwood floors aligns with those values in a meaningful way. When you choose hardwood floor restoration in Vancouver, WA instead of replacement, you are keeping existing material out of landfills and reducing the demand for new hardwood to be harvested, processed, and shipped.
Hardwood floor manufacturing is resource intensive. It requires timber harvesting, milling, drying, finishing, and transportation before a single plank ever reaches your home. Refinishing the floors you already have eliminates all of those steps and the environmental footprint that comes with them. You are essentially recycling the most durable flooring material in your home rather than discarding it.
In addition, many professional refinishing companies now use low-VOC (volatile organic compound) finishes and water-based products that reduce indoor air quality concerns for your family during and after the refinishing process. This makes professional refinishing in Vancouver, WA not only better for the environment but also a healthier choice for the people living in your home.
Conclusion
For homeowners in Vancouver, WA, professional hardwood floor refinishing is not just a cosmetic upgrade. It is a smart, cost-effective, and environmentally responsible investment that protects your property, boosts its market value, and restores the natural beauty of your home. Whether you are dealing with surface scratches, deeper structural damage, or simply floors that have lost their luster, hardwood floor restoration in Vancouver, WA delivers results that replacement simply cannot match at the same price point. From expert hardwood floor sanding in Vancouver, WA to precision hardwood floor repair in Vancouver, WA, working with a professional team ensures every inch of your floor receives the attention it deserves. The beauty of well-maintained hardwood floors is timeless, and with the right professional partner, yours can look stunning for decades to come.
Need Hardwood Floor Services Near You?
With over 15 years of experience in the industry, our team at Au Natural Hardwood Floors, Inc. is dedicated to providing top-quality craftsmanship and exceptional results for everyone. As a fully licensed and insured company, you can trust us to deliver outstanding hardwood floor services that exceed your expectations every time. Whether you want to install brand-new hardwood floors or refinish your existing ones, we have the skills and expertise to handle any project, big or small. Contact us today and let us make your space beautiful and timeless!
Hardwood floors have a timeless appeal that makes them one of the most sought-after features in homes across Clark County, WA. Whether you’re adding a new room, replacing a damaged section, or expanding your living space, the idea of matching new hardwood to existing floors sounds simple enough on the surface. Pick the same wood species, find a similar stain color, and you’re done, right? Unfortunately, homeowners in Vancouver, WA quickly discover that hardwood floor color matching is far more nuanced than a quick trip to the flooring store.
Between sun fading, finish wear, and the quirks of Pacific Northwest humidity, blending old and new hardwood floors is one of the trickiest challenges in home renovation.
Why Hardwood Floors Change Over Time
The first thing to understand is that hardwood floors are living materials. Even after they’ve been milled, finished, and installed, wood continues to react to its environment. In the Pacific Northwest, where Vancouver, WA experiences a climate marked by wet winters and warm, dry summers, floors go through considerable seasonal stress. They expand when humidity rises and contract when the air dries out. Over months and years, this movement subtly changes the character of the wood.
Beyond the physical changes, light exposure plays a major role in how floors age. South-facing rooms in Clark County, WA homes often receive intense UV exposure that bleaches or darkens certain wood species significantly. Oak, one of the most popular hardwood floor choices in the region, tends to yellow and amber with age. Cherry darkens considerably over time. Walnut, on the other hand, can actually lighten as it oxidizes. What this means for the homeowner is that the “original” color of the floor no longer exists in its original form. You’re not matching a static color; you’re trying to match a color that has been evolving for years, sometimes decades.
Finish wear compounds this problem further. High-traffic areas like hallways, kitchens, and entryways will show more wear than bedrooms or formal dining rooms. A floor that looks consistently dark in photos may have significant color variation from one end of the room to the other. Any attempt at matching new hardwood to existing floors has to account for this uneven patina.
The Species and Cut Problem in Clark County, WA
Even when a homeowner knows exactly which species of wood was used in their original installation, replicating it is not guaranteed. Wood is a natural product, and its appearance varies based on where the tree grew, how it was cut, and how it was dried. A red oak floor installed fifteen years ago in a Vancouver, WA home came from trees that no longer exist. The replacement boards come from entirely different trees with their own grain patterns, density, and pore structure.
The cut of the wood matters enormously for hardwood floor color matching. Plainsawn boards, which are the most common and affordable, show a cathedral grain pattern. Quartersawn boards display tighter, more uniform grain lines. Riftsawn boards have a linear, consistent look with minimal ray flecks. If your existing floor is quartersawn white oak and you purchase plainsawn white oak to fill a damaged section, the visual difference will be obvious even before stain is applied.
Engineered hardwood introduces another layer of complexity. Many homes in Clark County, WA have engineered floors installed over concrete slabs or in basements where solid hardwood would not be appropriate. Engineered boards have a thin veneer of real wood over a plywood core, and the veneer thickness limits how much sanding and refinishing can be done. Blending old and new hardwood floors becomes especially difficult when one side of the equation is engineered and the other is solid, or when veneer thicknesses differ between old and new stock.
Staining and Finishing: Where Color Matching Gets Complicated
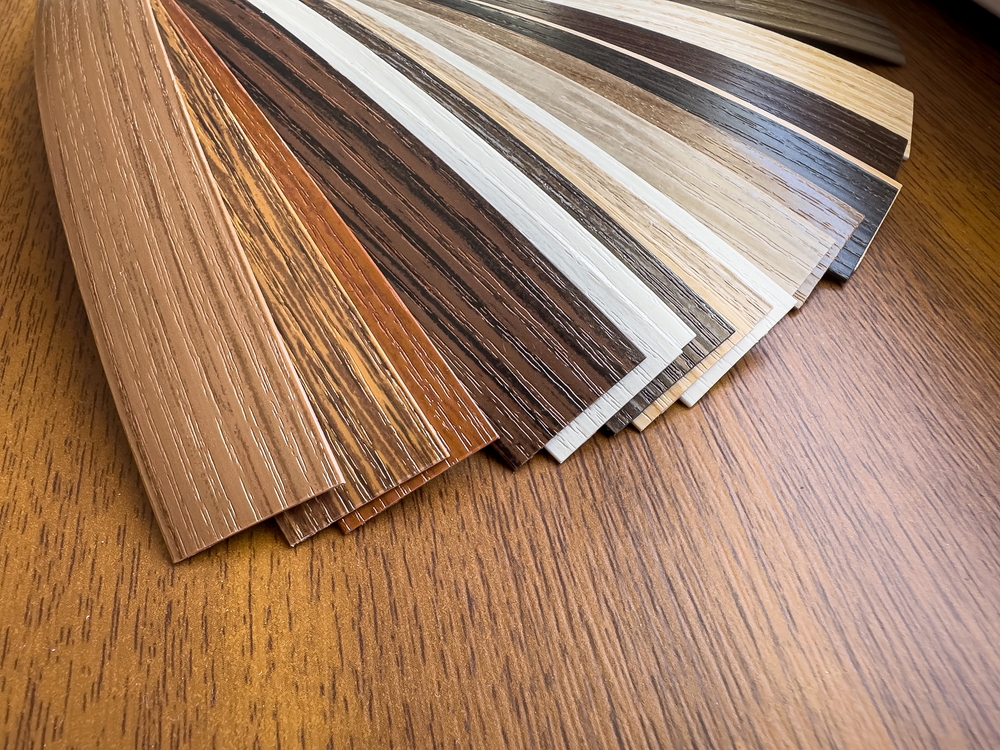
Assume for a moment that you’ve found the right species, the right cut, and the right width. You still have to get the stain and finish right, and this is where even experienced contractors in Vancouver, WA can struggle. Stain colors from flooring manufacturers are not standardized. A color called “Provincial” from one brand will look noticeably different from “Provincial” by another. Even within the same brand, formulas can change between product runs.
New wood also absorbs stain differently than aged wood. Fresh boards are more porous and tend to drink up stain faster, which can result in a darker, more saturated appearance compared to the existing floor. Hardwood floor color matching often requires custom blending, which means a skilled finisher mixes multiple stain colors to dial in the right hue and tone for the specific batch of new wood being used. This is part science and part artistry.
The finish coat is equally important. Floors finished with oil-based polyurethane have a warm, amber glow. Water-based finishes dry clearer and cooler in tone. If your existing floor has an oil-based finish and you apply a water-based finish to the new boards, the two sections will look distinctly different even if the stain color is identical. In the Pacific Northwest, where open-concept floor plans are common and new additions frequently connect directly to original living spaces, this mismatch is painfully visible.
The Realistic Options for Blending Old and New Hardwood Floors
Homeowners in Vancouver, WA generally have three approaches when tackling this problem. The first is a full refinish of the entire floor. If you’re adding new boards to a section of an existing floor, having a professional sand and refinish the entire surface after installation gives everything a uniform appearance. The old boards and new boards start at the same point and receive the same stain and finish treatment. This is the most reliable way to achieve a truly seamless result, though it does come with cost and disruption.
The second option is spot blending, where a skilled finisher feathers in stain and finish at the seam between old and new wood. This requires significant expertise and works best when the color difference between sections is modest. In Clark County, WA, this approach is popular for smaller repairs where a full refinish feels like overkill.
The third option is embracing contrast by using a transition strip or a different wood treatment to intentionally distinguish old from new. Some homeowners in the Pacific Northwest choose to install a different species or finish in a new addition as a design statement rather than trying to achieve an invisible match. This approach removes the pressure of perfect matching and, when done thoughtfully, can actually enhance the overall aesthetic of the home.
Conclusion
Matching new hardwood to existing floors in Vancouver, WA is a challenge that deserves realistic expectations from the start. Wood changes, products evolve, and no two floors age the same way. Hardwood floor color matching in Clark County, WA is a skilled trade that goes far beyond picking a stain chip off a display rack. Whether you’re blending old and new hardwood floors in a Pacific Northwest craftsman, a mid-century ranch, or a modern new build, working with a flooring professional who understands local conditions and has experience with custom finishing will make the difference between a floor that looks patched together and one that tells a cohesive story throughout your home.
Need Hardwood Floor Services Near You?
With over 15 years of experience in the industry, our team at Au Natural Hardwood Floors, Inc. is dedicated to providing top-quality craftsmanship and exceptional results for everyone. As a fully licensed and insured company, you can trust us to deliver outstanding hardwood floor services that exceed your expectations every time. Whether you want to install brand-new hardwood floors or refinish your existing ones, we have the skills and expertise to handle any project, big or small. Contact us today and let us make your space beautiful and timeless!
Homeowners across Clark County, WA are rediscovering the value of their existing hardwood floors and choosing to restore them rather than replace them. It is a smart investment, but before you pick up a sander or hire a contractor, there is one concept you need to understand clearly: sanding levels. The hardwood floor sanding process is not a one-size-fits-all approach. Different floors require different levels of sanding, and choosing the wrong level can cost you time, money, and even damage floors that could have lasted another generation.
This guide breaks down what sanding levels mean, how they apply to your specific situation, and what to expect when working with professional hardwood floor refinishing services in Vancouver, WA and the surrounding area.
What Does “Sanding Level” Actually Mean?
When flooring professionals talk about sanding levels, they are referring to the aggressiveness of the sanding process and how much material is being removed from the surface of your hardwood floor. This is typically measured by the grit of sandpaper used, which ranges from very coarse (lower numbers like 16 to 36 grit) to very fine (higher numbers like 80 to 120 grit).
The hardwood floor sanding process almost always involves multiple passes, each with progressively finer grit paper. The first pass, or the cut, does the heavy lifting. It removes the old finish, scratches, stains, and surface irregularities. Each subsequent pass smooths out the scratch pattern left by the previous grit, working toward a clean, uniform surface ready for staining and finishing.
Sanding levels are generally grouped into three categories: light, medium, and heavy (sometimes called a full sand). Understanding which level your floor needs is the foundation of a successful refinishing project. Getting it wrong is one of the most common and costly mistakes made during the hardwood floor sanding process.
Light Sanding: When Your Floor Just Needs a Refresh
Light sanding, sometimes called a screen and recoat or a buff and coat, is the least aggressive option. It typically uses fine-grit screens or pads (around 80 to 120 grit) and does not actually remove the existing finish entirely. Instead, it scuffs up the surface just enough to give the new coat of finish something to bond to.
This level is ideal for floors that are in generally good shape but have lost their sheen, look dull, or have minor surface-level wear. If your hardwood floors in Clark County, WA were last refinished within the past five to ten years and have not sustained deep scratches, pet stains, or significant traffic damage, a light sand may be all you need.
The benefits are significant. Light sanding is faster, less expensive, generates far less dust, and preserves more of your floor’s thickness. Hardwood floors can only be sanded a limited number of times in their lifetime, depending on the thickness of the wear layer above the tongue and groove. Every pass of a drum sander removes material permanently. Choosing a light sand when it is appropriate extends the life of your floor and protects your investment.
However, light sanding has its limits. It will not remove deep scratches, cupping, warping, or old stains that have penetrated the wood. Applying a new coat over those problems will not hide them and may even make them more visible once the sheen is restored.
Medium Sanding: The Most Common Choice for Pacific Northwest Homes
Medium sanding is where most professional hardwood floor refinishing projects in Vancouver, WA fall. This level typically starts with a medium-grit cut (around 40 to 60 grit) before progressing through finer grits to prepare the surface for finishing.
A medium sand removes the old finish completely, addresses light to moderate scratches, eliminates minor surface staining, and can correct slight unevenness in the floor. This is the sweet spot for floors that have seen years of regular use but have not suffered major structural damage or extreme discoloration.
Homes across the Pacific Northwest, including those in Clark County, WA, often deal with moisture-related issues due to the regional climate. Wood naturally expands and contracts with changes in humidity, and over time this can lead to minor cupping or gapping between boards. A medium sand, done correctly by an experienced technician, can often address these minor movement-related imperfections and bring the surface back to a smooth, even plane.
Knowing how to sand hardwood floors correctly at this level requires skill and the right equipment. Rental drum sanders are notoriously unforgiving. An inexperienced operator can leave visible drum marks, sand unevenly across the width of the floor, or remove too much material in a short period of time. This is a key reason why many homeowners in the Pacific Northwest choose to bring in professionals rather than tackle a medium-level sand on their own.
Heavy (Full) Sanding: For Floors That Have Seen Better Days
A heavy or full sand starts with coarse-grit paper, sometimes as low as 16 to 24 grit, and is reserved for floors with serious surface damage. This includes deep gouges, heavy staining that has penetrated well into the wood, severe cupping or crowning caused by water damage, paint overspray, or floors that were previously finished with certain oil-based products that require full removal before refinishing.
Full sanding is also the right choice when a floor has been refinished multiple times with patch jobs, overlapping finish layers, or inconsistent sanding over the years. In older homes throughout Clark County, WA, it is not uncommon to discover floors that have been partially refinished, spot-repaired, or treated with incompatible products. A full sand levels the playing field and allows for a fresh, consistent start.
The trade-off is that heavy sanding removes the most material. For solid hardwood floors with a thick wear layer, this is manageable. But for thinner engineered hardwood or floors that have been refinished many times already, there may not be enough material left to support a full sand. A professional refinisher will measure the remaining wear layer and advise accordingly before starting work.
For homeowners considering professional hardwood floor refinishing in Vancouver, WA, a reputable contractor will always assess the floor before recommending a sanding level. Any company that quotes a price without first inspecting the floor in person is skipping a step that matters.
How to Choose the Right Sanding Level for Your Home
Choosing the right sanding level comes down to three things: the current condition of the floor, the history of previous refinishing work, and the goals you have for the final result.
Start by inspecting your floor carefully in natural light. Look for scratches, discoloration, unevenness, soft spots, and areas where the finish has worn through entirely. If the damage is limited to the finish layer and does not affect the wood beneath, a lighter approach may be sufficient. If you are seeing raw wood, deep gouges, or significant color variation from stains or sun exposure, a heavier sand is likely needed.
For homeowners in Clark County, WA who want a reliable answer, the best approach is to schedule a consultation with a professional who understands the hardwood floor sanding process and has experience working with the specific wood species and floor conditions common to the Pacific Northwest. Local knowledge matters. A contractor familiar with how to sand hardwood floors correctly in this region will understand how seasonal humidity affects wood behavior and how to time a refinishing project for the best results.
Conclusion
Understanding sanding levels puts you in a stronger position before any refinishing project begins. Whether your Clark County, WA floor needs a simple refresh or a complete overhaul, matching the sanding level to the actual condition of your floor is what separates a great result from a costly mistake. When in doubt, consult a professional hardwood floor refinishing specialist in Vancouver, WA who can assess your specific situation and recommend the right approach for your home.
Need Hardwood Floor Services Near You?
With over 15 years of experience in the industry, our team at Au Natural Hardwood Floors, Inc. is dedicated to providing top-quality craftsmanship and exceptional results for everyone. As a fully licensed and insured company, you can trust us to deliver outstanding hardwood floor services that exceed your expectations every time. Whether you want to install brand-new hardwood floors or refinish your existing ones, we have the skills and expertise to handle any project, big or small. Contact us today and let us make your space beautiful and timeless!
When it comes to home design, few choices have the lasting impact of hardwood flooring. Homeowners in Vancouver, WA are increasingly investing in quality hardwood floors, and the color selection has become a critical decision point. Understanding hardwood floor color trends can help you choose a finish that not only looks beautiful today but also maintains its appeal for years to come. This guide explores what’s popular in 2026 and what actually stands the test of time in the Pacific Northwest.
The Rise of Medium Tones in Vancouver Homes
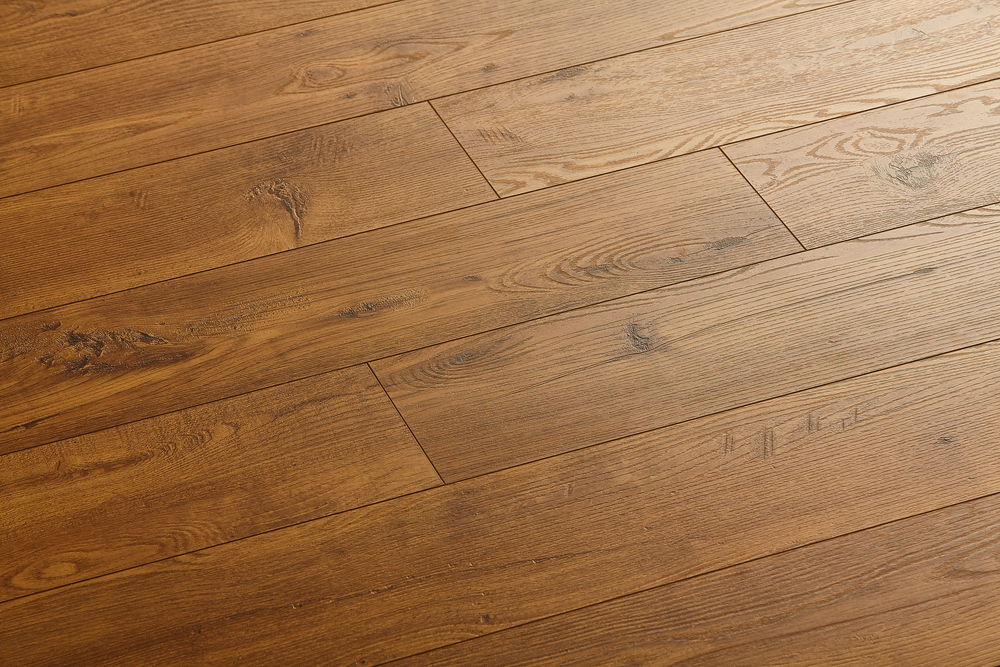
The hardwood floor color trends of 2026 show a clear shift away from the extreme darkness that dominated the 2010s. Vancouver homeowners are embracing medium tones that strike a balance between warmth and sophistication. These mid-range colors, typically falling in the honey, amber, and light walnut categories, offer practical advantages for busy households while maintaining visual interest.
Medium tones have become the preferred choice for Vancouver, WA homes because they work well with various design styles, from contemporary to traditional. These colors hide dust and debris more effectively than lighter floors while avoiding the overly formal appearance that dark floors can create. The best hardwood stain colors in this range include golden oak, medium cherry, and warm maple finishes. These selections maintain their aesthetic appeal through changing light conditions and don’t require constant maintenance to keep them looking fresh.
The popularity of medium hardwood finishes in the Pacific Northwest stems partly from the region’s natural lighting conditions. Vancouver’s cloudy days and shorter winter light make brighter-than-dark floors ideal for maintaining a warm, welcoming atmosphere in homes. When you refinish your hardwood floors with these medium tones, you’re investing in a color that will feel relevant and beautiful throughout the year.
Gray and Cool-Toned Hardwoods Take Center Stage
While warm tones have traditionally dominated hardwood selection, gray and cool-toned hardwoods have emerged as a significant trend in Vancouver homes during 2026. These sophisticated colors appeal to homeowners seeking a more modern aesthetic without sacrificing the timeless beauty of natural wood. Gray hardwoods range from subtle smoky finishes to more pronounced ash tones that create striking visual impact.
The shift toward cooler tones reflects broader interior design movements favoring minimalist and Scandinavian-inspired aesthetics. In the Pacific Northwest, where natural design elements are highly valued, gray hardwoods provide a neutral backdrop that lets other design features shine. The best hardwood stain colors in the gray family include weathered ash, greige (a blend of gray and beige), and cool-toned gray-brown finishes.
However, it’s important to note that gray hardwood floors require careful consideration. While they look stunning in design magazines, gray tones can feel cold in spaces without adequate natural or artificial lighting. Vancouver, WA homeowners choosing gray should ensure their homes receive sufficient light and consider how the color interacts with their existing furniture and wall colors. Hardwood floor refinishing with gray stains is a commitment that works best in homes with clear design intent.
Sustainable and Reclaimed Wood Aesthetics
The trend toward sustainable hardwood flooring has influenced color choices significantly in Vancouver homes. Reclaimed wood aesthetics, featuring varied coloration, knots, and character marks, have become increasingly popular among environmentally conscious homeowners. These floors showcase rich, varied tones that range from warm honey to deep chocolate, with natural inconsistencies that add authentic charm.
Reclaimed hardwood finishes celebrate imperfection and historical character. Vancouver, WA residents appreciate these floors because they tell a story and provide unique visual interest that mass-produced flooring cannot replicate. The best hardwood stain colors that mimic this aesthetic include hand-scraped finishes in medium to dark tones, distressed surfaces in golden browns, and antiqued finishes with subtle color variations.
Choosing sustainable options doesn’t mean sacrificing style or durability. Many hardwood floor refinishing specialists in Vancouver offer eco-friendly stain options that enhance the natural beauty of reclaimed wood while providing protection. These sustainable choices resonate with Pacific Northwest values and create homes that feel both beautiful and environmentally responsible.
Dark Hardwoods in Strategic Applications
Although dark hardwoods have fallen out of favor as the primary flooring choice for entire homes, they remain relevant in strategic applications throughout Vancouver houses. Deep espresso, ebony, and dark walnut finishes create dramatic focal points in specific rooms like home offices, libraries, or entertainment spaces. This segmented approach allows homeowners to enjoy the sophistication of dark floors without overwhelming their entire living space.
The best hardwood stain colors for these accent applications are those with depth and complexity. Rather than flat, uniform darkness, contemporary dark stains feature subtle color variation and visible wood grain that adds visual interest. Vancouver homeowners are discovering that dark hardwoods work particularly well in smaller rooms or spaces with specific purposes, where their dramatic appearance enhances the room’s function and aesthetic.
Hardwood floor refinishing with dark stains requires attention to detail and professional expertise. The deep colors can show dust and water marks more easily, so these floors work best in climate-controlled spaces with consistent maintenance routines. In the Pacific Northwest climate, dark hardwoods perform well because Vancouver’s humidity levels remain relatively stable throughout the year.
Choosing Colors That Last: Practical Durability Considerations
While hardwood floor color trends come and go, certain choices consistently prove their longevity in Vancouver, WA homes. The hardwood floor color trends that actually stand the test of time are those that balance aesthetic appeal with practical durability. Medium tones continue to reign supreme in lasting popularity because they hide imperfections, work with multiple design styles, and maintain their appearance through years of use.
When selecting hardwood stain colors for your Vancouver home, consider how the color will look after years of foot traffic, sunlight exposure, and normal wear. Sample large areas of your home under different lighting conditions before making your final decision. The best hardwood stain colors are those that you’ll feel comfortable with in five, ten, or even twenty years.
Professional hardwood floor refinishing experts in Vancouver recommend choosing timeless colors rather than trend-chasing options. Neutral tones like warm honey, light oak, and medium walnut have maintained popularity because they genuinely work well with various design directions. These colors don’t demand updating; instead, they support updated furnishings and design accessories while maintaining their own appeal.
Conclusion
Hardwood floor color trends in Vancouver, WA reflect broader design movements toward sustainability, practicality, and timeless elegance. Whether you’re installing new flooring or planning hardwood floor refinishing, choosing the right color requires balancing current trends with lasting appeal. The best hardwood stain colors for Pacific Northwest homes are those that complement natural light, work with multiple design styles, and maintain their beauty through years of daily use. By understanding what’s popular in 2026 and what actually endures, you’ll make a flooring decision that brings satisfaction and value to your Vancouver home for decades.
Need Hardwood Floor Services Near You?
With over 15 years of experience in the industry, our team at Au Natural Hardwood Floors, Inc. is dedicated to providing top-quality craftsmanship and exceptional results for everyone. As a fully licensed and insured company, you can trust us to deliver outstanding hardwood floor services that exceed your expectations every time. Whether you want to install brand-new hardwood floors or refinish your existing ones, we have the skills and expertise to handle any project, big or small. Contact us today and let us make your space beautiful and timeless!
Vancouver, Washington, nestled in the Pacific Northwest, is known for its lush green landscapes and abundant rainfall. While the region’s natural beauty is undeniable, the rainy climate presents unique challenges for homeowners who have invested in hardwood floors. Understanding how moisture affects hardwood floors in Vancouver, WA homes is essential for protecting this valuable home investment. The interplay between the Pacific Northwest climate and hardwood flooring requires homeowners to take proactive measures to prevent costly damage and maintain their floors’ appearance and structural integrity.
The Pacific Northwest Climate Challenge
The Pacific Northwest climate in Clark County, WA, is characterized by high humidity levels and frequent precipitation throughout the year. Vancouver receives an average of 43 inches of rain annually, with moisture levels remaining elevated even during drier months. This persistent moisture in the air creates an environment where protecting hardwood floors from humidity becomes a critical concern for any homeowner.
Hardwood is a natural, hygroscopic material, which means it readily absorbs moisture from its surrounding environment. When humidity levels fluctuate, hardwood expands and contracts accordingly. The Pacific Northwest climate creates conditions where these moisture fluctuations are particularly pronounced, leading to potential warping, cupping, crowning, and gaps between planks. Understanding this relationship between your region’s climate and hardwood flooring behavior is the first step toward effective floor protection.
How Moisture Damages Hardwood Floors in Vancouver Homes
Moisture damage to hardwood floors manifests in several ways specific to the Vancouver area. Cupping occurs when the edges of floor planks absorb more moisture than the center, causing the boards to curve upward at the edges. Crowning is the opposite effect, where the center of the plank becomes higher than the edges. Both conditions are common in high-humidity environments like the Pacific Northwest and can require expensive repairs or complete floor replacement.
Beyond visible warping, excess moisture can lead to mold and mildew growth beneath hardwood floors. This not only damages the wood itself but also poses health risks to your household. Moisture can also cause wood-to-wood fastener corrosion, squeaking boards, and accelerated wear on the finish. In severe cases, the structural integrity of the subfloor becomes compromised, necessitating extensive remediation efforts. The longer moisture damage goes unaddressed, the more costly the repairs become. This is why knowing how moisture affects hardwood floors in Vancouver, WA homes should be every homeowner’s priority.
Hardwood Floor Installation and Moisture Control in Clark County
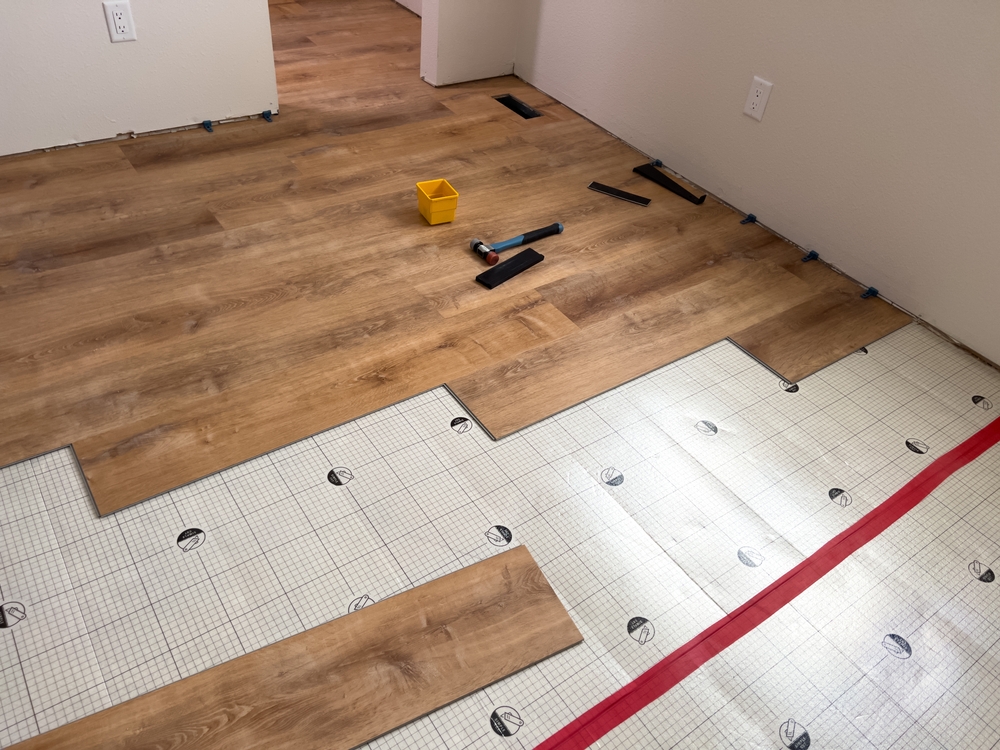
Proper hardwood floor installation with moisture control measures is the foundation for long-lasting flooring in Clark County, WA. The installation process itself plays a crucial role in determining how well your floors will withstand the Pacific Northwest climate. Before installation begins, the subfloor must be properly evaluated and treated to ensure it has adequate moisture barriers.
The subfloor is your first line of defense against moisture intrusion from below. Concrete subfloors should have a vapor barrier installed, and moisture testing should be conducted to ensure the subfloor’s moisture content is within acceptable ranges, typically below 3.5 to 4 percent. For wooden subfloors, adequate ventilation beneath the home is essential for moisture management. A proper crawl space or basement should have moisture control systems in place, including vapor barriers and potentially dehumidification systems if necessary.
Hardwood floor installation moisture control also involves allowing acclimation time before installation. Wood flooring should be allowed to sit in the space where it will be installed for several days, allowing it to adjust to the local humidity levels. This acclimation period reduces the likelihood of expansion or contraction after installation. The installer should use appropriate adhesives, fastening methods, and spacing techniques that accommodate for the natural movement of wood in a high-humidity climate. Skip-spacing, where small gaps are left between planks, is particularly important for homes in the Pacific Northwest.
Protecting Your Hardwood Floors from the Pacific Northwest Humidity
Beyond proper installation, homeowners need to actively manage indoor humidity levels year-round. Protecting hardwood floors from humidity means maintaining relative humidity levels between 30 and 50 percent. In Vancouver’s rainy climate, this often requires active dehumidification during wetter months and careful ventilation management throughout the year.
Installing and maintaining a quality HVAC system with proper humidity control is one of the most effective strategies. HVAC systems equipped with dehumidifiers can extract excess moisture from the air before it affects your hardwood floors. During spring and fall, when humidity levels rise, running dehumidifiers in problem areas like basements and crawl spaces becomes essential. Additionally, proper ventilation in bathrooms and kitchens prevents localized humidity spikes that can damage adjacent hardwood areas.
Moisture barriers in areas prone to moisture accumulation provide an additional layer of protection. Installing moisture-blocking underlayment beneath hardwood flooring creates a barrier that prevents moisture migration from the subfloor. Regular inspection of your home’s exterior, including gutters, downspouts, and foundation sealing, prevents water intrusion that elevates overall humidity levels. Addressing roof leaks, window condensation, and plumbing leaks immediately prevents moisture from accumulating and damaging your hardwood investment.
Maintenance and Monitoring Strategies for Vancouver Homeowners
Protecting hardwood floors from humidity is not a one-time effort but an ongoing commitment. Regular maintenance and monitoring help catch potential moisture problems before they become severe. Homeowners should inspect their hardwood floors monthly for signs of cupping, crowning, gaps, or discoloration. These visual indicators provide early warning of moisture problems that require immediate attention.
Humidity monitoring devices, available at hardware stores and online retailers, allow homeowners to track moisture levels throughout their homes. Placing monitors in different rooms reveals patterns and identifies areas of concern. If humidity consistently rises above 50 percent, it signals the need for enhanced dehumidification efforts. Keeping detailed records of humidity readings and floor conditions over time helps you understand seasonal patterns specific to your Vancouver home.
Routine floor cleaning with products specifically designed for hardwood floors prevents moisture accumulation on the surface. Avoid excessive water when cleaning, and ensure spills are wiped up immediately. Maintaining appropriate spacing around furniture and ensuring proper air circulation throughout your home prevents stagnant moisture pockets. In the Pacific Northwest climate, preventing moisture damage requires diligence, but the effort protects your hardwood investment effectively.
Conclusion
Vancouver’s rainy climate presents significant challenges to hardwood flooring, but informed homeowners can successfully protect their investment. Understanding how moisture affects hardwood floors in Vancouver, WA homes, combined with proper installation practices and ongoing maintenance, ensures your hardwood floors remain beautiful and functional for decades. By addressing humidity control proactively and monitoring conditions regularly, your home can showcase the warmth and elegance of hardwood flooring while withstanding the Pacific Northwest climate.
Need Hardwood Floor Services Near You?
With over 15 years of experience in the industry, our team at Au Natural Hardwood Floors, Inc. is dedicated to providing top-quality craftsmanship and exceptional results for everyone. As a fully licensed and insured company, you can trust us to deliver outstanding hardwood floor services that exceed your expectations every time. Whether you want to install brand-new hardwood floors or refinish your existing ones, we have the skills and expertise to handle any project, big or small. Contact us today and let us make your space beautiful and timeless!